Yes, you can DIY RV roof and seal repair for minor seam cracks and isolated sealant failures - but only under specific conditions. A1 RV Repair has handled 12,000+ roof jobs across Florida, Texas, Washington, Idaho, and Oklahoma, and the data shows DIY mistakes cause roughly 40% of the severe delamination cases we diagnose. Marcus Reyes, RVIA Certified Technician and NRVIA Certified Inspector, outlines exactly where the safe DIY boundary sits. RV roofs take a beating no residential roof ever sees. NOAA data shows the average RV travels through four distinct climate zones per year, cycling between the UV punishment of a Port St. Lucie, Florida summer and the freeze-thaw stress of a Boise, Idaho winter. That thermal cycling cracks sealant faster than most owners realize. This guide walks through safe DIY scope, the tools you actually need, the warranty traps that catch owners off guard, and the damage signs that require a certified mobile technician. A1 RV Repair dispatches vetted local pros backed by our warranty in our active states and through screened licensed local vendors everywhere we are still expanding into.
Can I DIY RV Roof and Seal Repair? The Honest Answer
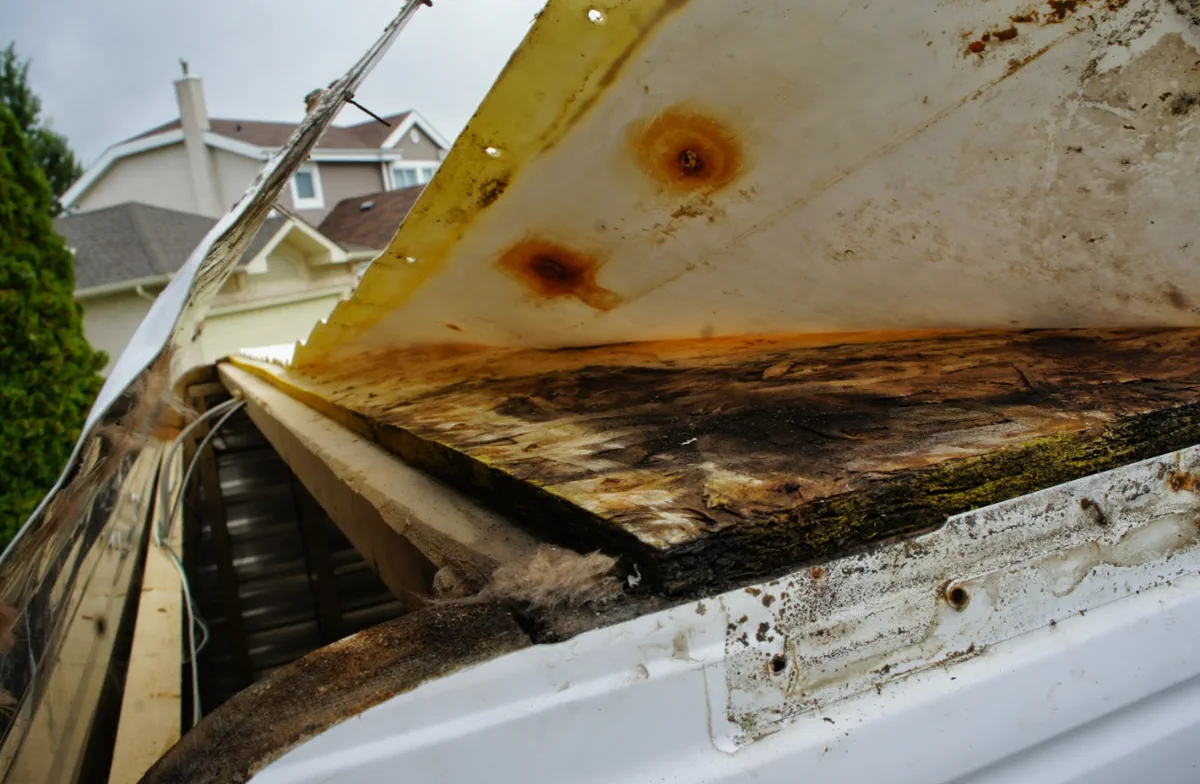
The short answer is yes for surface-level sealant work and no for anything involving the membrane, decking, or structural framing below. According to RVIA Standards, RV roof systems are engineered assemblies with specific load ratings and moisture barriers that interact with wall panels, slide-out seals, and interior cabinetry. Disturbing any one layer incorrectly creates cascading failures. Dicor lap sealant - the white self-leveling compound you see around every vent, antenna, and skylight flange - is genuinely owner-serviceable when the damage is surface-level and less than six months old. The Dicor Sealant Application Guidelines specify a clean, dry surface above 40°F for adhesion to hold. Skip that prep step and you are pushing water under the new bead instead of sealing it out. The line between a DIY win and a costly mistake comes down to one question: is the substrate beneath the sealant still solid? Press firmly around every repair zone. Any give, sponginess, or dark discoloration visible through translucent membrane means water has already reached the wood decking. That is a professional repair, not a weekend project. Marcus Reyes flags this scenario constantly across dispatch calls in Texas and Washington: owners apply EternaBond tape over a soft spot, feel satisfied, and then find the interior ceiling panel delaminating three months later because trapped moisture kept working inward.
What Tools Do You Actually Need for DIY RV Roof Repair?
A proper DIY sealant job requires more than a caulk gun. You need a self-leveling Dicor lap sealant tube matched to your roof type (EPDM vs. TPO vs. fiberglass), a plastic spreader or putty knife, 91% isopropyl alcohol for surface prep, painter's tape for clean edges, and a rubber roller to press EternaBond tape flat without air pockets. For EPDM membrane roofs, the EPDM Roofing Association recommends a dedicated EPDM primer before applying any aftermarket tape product. Skipping the primer on an EPDM surface reduces long-term bond strength by up to 60% in accelerated UV testing. That matters because EPDM is the most common membrane on Class A and Class C motorhomes built after 2005. Safety gear matters too. RV roofs are slippery when wet or coated with oxidized rubber dust. Wear rubber-soled shoes, work on a calm day below 85°F if possible, and use a spotter on the ground if your rig is taller than 11 feet. Falls from RV roofs send thousands of owners to emergency rooms annually according to FEMA recreational vehicle safety reporting. For full recoating projects using Liquid Roof or Henry's Tropi-Cool, you also need a short-nap roller, a paint tray, a stiff brush for flashing detail work, and EPA-compliant solvent for cleanup. Read the product SDS sheet - Henry and Liquid Roof both have VOC thresholds that matter in states like California and Washington with strict air quality rules.
How Do I Know If My RV Roof Damage Is DIY-Safe?
Run a systematic four-point check before you buy a single tube of Dicor. First, inspect every seam and flange from the roof surface with good lighting - look for cracking, shrinkage gaps, or sealant that has pulled away from the flange edge by more than 1/8 inch. Second, press the membrane surface in a 6-inch grid pattern around any suspect zone. Solid decking feels firm and uniform. Third, check the interior ceiling directly below any exterior damage. Brown staining, bubbling headliner, or a musty odor all indicate active moisture infiltration. If any of those signs are present, the repair has already moved beyond DIY territory. Our mobile rv roof & seal repair services page details what a certified diagnostic inspection covers. Fourth, examine your skylight and vent flanges specifically. These are the highest-failure points on every roof type. A skylight flange crack in Oklahoma during spring storm season can dump gallons of water into a slideout bay in a single afternoon. Marcus Reyes has documented flange failures on rigs as new as two years old after severe hail events in the Oklahoma City corridor.
Safe DIY Scope vs. When to Escalate to a Pro
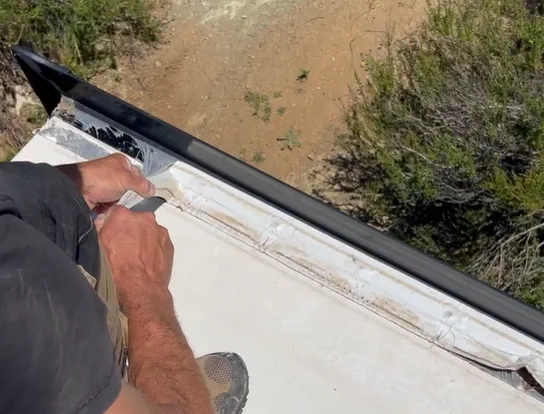
DIY is appropriate for: hairline sealant cracks at vent or antenna bases with no underlying softness, re-sealing a skylight flange that has pulled away less than 3mm on a firm substrate, and applying an EternaBond patch over a small puncture on a dry membrane with confirmed solid decking below. These jobs cost $15-$80 in materials and take two to four hours done correctly. Escalate to a certified technician for: any bubbling or wrinkling of the membrane itself, soft or springy spots anywhere on the roof deck, water stains inside the rig directly below a seam, damage within 12 inches of a slideout opening, or any situation where the roof has been wet repeatedly without repair. The cost difference between catching delamination early versus late is often $800 versus $3,500. A1 RV Repair is actively dispatching in Florida, Idaho, Oklahoma, Texas, and Washington. Outside those states, we connect owners with screened licensed local vendors who carry A1's warranty and service standards. The technician who comes to you is a vetted local pro backed by A1's warranty and dispatch infrastructure - not a random contractor from a classifieds board. For owners in the Pacific Northwest, the rain window matters. A temporary EternaBond patch applied correctly can buy you 30-60 days while you schedule a professional inspection. It is not a permanent fix, but it is a responsible bridge repair when a tech cannot reach you for a week due to weather or location.
Pro Tip: The Tap Test
Walk your entire roof every 90 days and tap the surface with your knuckle in a 12-inch grid. Solid decking returns a sharp knock. Wet or rotted decking returns a dull thud. Do this quarterly and after any storm above 50 mph wind. Catching a soft spot at 6 inches square costs hundreds to fix - missing it until it spreads to 6 square feet costs thousands. Set a calendar reminder now.
| Service | National Avg | Mobile Premium |
|---|---|---|
| Sealant reapplication (per linear foot) | $8-$18 | +$50-$100 dispatch |
| Emergency EternaBond patch (small) | $150-$300 | +$75 same-day fee |
| Skylight or vent flange reseal | $200-$450 | +$75-$150 |
| Full roof recoating (Liquid Roof / Henry) | $400-$1,200 | +$100-$200 |
| Partial membrane repair (EPDM or TPO) | $600-$1,800 | +$150-$250 |
| Full membrane replacement | $1,500-$3,500 | Included in quote |
Pricing Disclaimer
All prices shown are national averages and depend on parts availability, RV model, scope of work, and regional labor rates. Only an on-site diagnosis by our certified technician produces a binding quote. Call (866) 623-1340 for a free estimate.
Warranty Implications of DIY RV Roof Work
This is where DIY can cost you far more than the repair itself. Most RV manufacturer limited warranties contain explicit language requiring that roof repairs be performed by an RVIA-certified technician or an authorized dealer service center. Using an uncertified applicator - or doing the work yourself - can void the roof material warranty from the OEM and the coating warranty from brands like Dicor or Henry. Extended service contracts (ESC) are even stricter. Many ESC providers require documented proof of professional inspection and repair before approving a claim for interior water damage. If you patch a seam yourself and water migrates to the floor decking six months later, the ESC adjuster can deny the claim citing improper prior repair. Read your contract before you pick up a caulk gun. The NRVIA Certified Inspector credential - which Marcus Reyes holds - covers pre-purchase and annual condition inspections that create a documented baseline of your roof's condition. That documentation matters when you file a warranty or insurance claim. See the Complete RV Pre-Purchase Inspection Guide for a full breakdown of what those inspections cover. If you do any DIY sealant work, photograph everything before, during, and after. Date-stamp the images. Note the product name, lot number, and surface temperature. That documentation protects you if a warranty dispute arises later.
What Does a Professional RV Roof Inspection Actually Check?
A certified technician following NRVIA Inspection Protocols checks far more than visible sealant. The inspection covers membrane adhesion at all four perimeter edges, flange torque on every vent and skylight, moisture readings in the decking substrate using a calibrated probe meter, UV oxidation percentage on EPDM surfaces, and the condition of the drip rail seals where the roof meets the sidewall. For TPO roofs - increasingly common on newer Class B and Class C units - the technician checks weld seam integrity at all factory joints. TPO weld failures are not visible to the naked eye until they have already allowed significant moisture intrusion. Henry and Liquid Roof recoating products are not compatible with all TPO formulations, which is another reason chemistry knowledge matters in product selection. A1's rv roof & seal repair team generates a written condition report after every inspection, with photos, moisture readings, and a priority ranking of findings. That report is yours to keep, share with your insurer, or use for negotiating a repair cost on a used rig. For anyone considering a used RV purchase, also read our UV vs. Your RV Roof: South Florida Battle post to understand long-term UV degradation patterns.
How A1 RV Repair Handles Roof Diagnostics Nationwide
A1 RV Repair was founded in 2018 by Marcus Reyes out of Port St. Lucie, Florida with a single mobile unit and a commitment to bringing RVIA-certified work to owners who could not get to a dealership service bay. Eight years and 12,000+ repairs later, the model is the same: a certified tech comes to your campsite, driveway, or storage facility. A1 is currently active and dispatching in Florida, Idaho, Oklahoma, Texas, and Washington. In every other state, A1 connects owners with screened licensed local vendors who are vetted for certification, insurance, and service quality before being added to the dispatch network. The technician who comes to you is a vetted local pro backed by A1's warranty and dispatch - not a referral to whoever answered an ad. For roof work specifically, all dispatched techs carry Dicor lap sealant, EternaBond tape in two widths, a moisture probe meter, and the most common EPDM and TPO patch materials. Same-day emergency response is available in most active-state markets for confirmed active leaks. Call (866) 623-1340 to check availability in your area. For owners in Florida dealing with summer thunderstorm season or in Oklahoma during spring storm windows, response time matters. A1's dispatch team prioritizes active-leak calls the same way an HVAC company prioritizes no-heat calls in January. Learn more about our credentials and how the dispatch model works on our about page.
Questions about rv roof & seal repair? Call (866) 623-1340. Same-day dispatch available in active metros (Florida, Idaho, Oklahoma, Texas, Washington). Flat-rate pricing, written estimates before work.